Showing posts with label Chicken. Show all posts

Sunday, November 7, 2010

Chicken & Dumplings

As the weather turns cool and the days get shorter it seems as though the need for foods to warm our bodies and comfort our souls become the order of the day replacing those light and cool days of summer, I'll share a secret here, "I crave these foods all year long." One of my favorites for as long as I can remember has been chicken & dumplings. They seem to put a smile on my face on gloomy wet days and warm the body like wrapping in one of Granny's quilts while enjoying the fire in the fire place.
This is my granny's recipe that I grew up eating. I have tried quite a few variations, some where closer to chicken soup. While good they get away from the basic simplicity that makes this dish truly delicious, celebrating the star of  the show. The chicken. Enjoy!

Prep time: 30 min                      Cook time: 2 1/2 hrs

Tools: Large stock pot, fat separator, tea ball

Ingredients:

3 bone in skin on chicken breasts
2 1/2 quarts water
2 bay leaf
2-3 cloves garlic( paper on)
8 peppercorns
1/2 tsp thyme

Dumplings:
1 1/2 cups all purpose flour
1/3 cup shortening
1 tsp baking powder
1/2 tsp salt
1/2 tsp poultry seasoning (or 1/4 tsp each thyme & sage)
1/3 cup milk


Directions:

Place a large stock pot on medium high heat add the water bay leaf, garlic and chicken. add the thyme and peppercorns to the tea ball and drop into the pot with the chicken.

As the  the pot starts of come to a boil reduce the heat to med low cover wit the lid cocked off a little and simmer for 2 hrs. After about 30 min skim any of the protein scum from the pot replace the lid and continue the simmer.

After the two hours turn off the heat and remove the chicken to a plate and allow to cool. Remove the tea ball,bay leaf and garlic.

Over a large bowl place a strainer lined with two layers of cheese cloth and pour the chicken stock through the lined strainer. Ladle the hot stock into a fat separating cup and pour the de-fatted stock back into the stock pot.

Remove the skin from the breast meat and pull off the bones tear the meat into pieces about 1/2 " x 2 " place in the refrigerator.

To make the dumplings sift 1 1/2 cups of all purpose flour  together with the baking powder, poultry seasoning, and salt into a mixing bowl. Add the shortening and rub into the flour with your fingers until it looks like little pebbles.
 Form a well in the center and add the milk pull the flour from the outside and work to the center mixing until the dough forms a ball.

Knead the dough 4- 5 times reshape into a ball and allow to rest 5 min. Cut the ball into 4 equal pieces then cut those pieces in 1/2. Roll the pieces into ropes 1/2 - 3/4 " in dia. using a sharp knife or a dough blade cut the ropes into 1/2" pieces.


Bring the stock pot back to a low boil add the dumplings a few at a time place the lid on the pot leaving a little space for the steam to escape and simmer 20 minutes. When the dumplings are no longer floating  they are done. Turn off the heat and add the chicken back to the pot let stand 5 min to reheat the chicken prior to serving.

Wednesday, October 6, 2010

Chicken and Green Chile Enchiladas

Whether Mexican, South western, or Tex Mex, the flavor of "Green Chilies" rule. To say that it is one of my favorites is a pure understatement. Spicy and sweet but not over powering, they play well with all sorts of ingredients or can take the lead as the main ingredient. With enchiladas being one of the great comfort foods of the world this is a good place to showcase this Chili, it really punches up the flavor and elevates the chicken in this version.
I grew up eating enchiladas mostly beef or cheese at least once a week. It was not until I was in High School that I had this version. It was on a trip to San Antonio with  my then girlfriends family that I first had Green Chili Chicken Enchiladas served with a little crema  I was sold, I had a new favorite. When I came home  mom was put on a quest for the recipe. Where she got it from I haven't a clue. All I can say is I have enjoyed these at home and  in Mexico and could not tell any difference in flavor or texture.
One of the nice things about Enchiladas is that any lightly seasoned meat can be used. In this case left over roast chicken would be a prime candidate or a rotisserie chicken picked up in the deli section. Enchiladas are one of those meals that look so complex to prepare but are ultra simple. Enjoy!    


Ingredients:

1 lb chicken cooked, torn into pieces
1 medium onion, fine dice
1 6 oz can green chilies
2 cups low sodium chicken stock, divided
1/2 cup  low or no fat sour cream
1 tsp cumin seed or 1/2 tsp ground cumin
1/2 tsp Mexican oregano crushed up or 1 tsp European oregano
3 tbl Cilantro fine dice
2 cloves garlic fine dice
1 tsp Kosher salt
1 1/2 cups Colby Jack cheese divided
8 corn tortillas ( home made are best)
1/2 cup oil
1 tbl Masa Harina ( corn flour)
1/3 cup + 2 tbl *Salsa Verde (Green chili sauce)
*San Marcos brand or Pace recommended


Tools: 10" heavy bottom skillet, 8 " skillet, 1 qrt sauce pan, 9X11" baking dish


Directions:

Place the heavy bottom skillet  over medium heat,when you can feel the heat starting to radiate off the bottom add the cumin seed and toast them for a min or two. add about 1tbl of the oil to the pan and continue to warm.
Add the onion and salt and cook until they begin to become translucent add 1/2 the chilies and all the garlic cook about 2 min. more.
Add the oregano, cilantro and chicken and 1/2 of the chicken stock.
Bring to a simmer after about 10 min  break up the chicken and continue to reduce the liquid until there is none left but the meat is moist. remove from heat and allow to cool. In the mean time, prepare  the baking dish by spreading  the 1/3 cup Salsa Verde on the bottom of the  baking dish. and prepare the Green Chile gravy:
In the 1 qrt sauce pan whisk together 1 cup chicken stock, sour cream, reserved chilies, 2 tbl Chile Verde and *Masa Harina . Bring to a boil for 1 min and remove from heat whisk 1 min.
Heat the oil in the 8 in Skillet to about 150 deg.
                                                      set up an assembly line


Start assembly by putting the 1/3 cup salsa verde into the  bottom of the baking dish spread evenly.
Take a tortilla and place it in the hot oil to warm for about 10- 15 sec. allow to drain over the skillet and trans fer it to the baking dish.

Place a tablespoon of the chicken filling in the center of the tortilla  and spread evenly
top with some of the shredded Colby Jack then fold the side closest to you over the center and roll the tortilla over onto itself placing the seam on the bottom. Repeat the process for the remaining ingredients.

 Preheat your oven to 350 º F  pour the Green Chile gravy over the top and then cover with the Colby Jack.
Cover with aluminum foil and bake for 20 min increase the oven temp to 400º F remove the foil and brown the cheese a little on top.
 Allow to cool 10 min prior to serving. Serve with Spanish rice, re-fried beans.

Tuesday, September 28, 2010

Chicken By The Book >The Spachcocked Clucker

I guess the fondness for Roast Chicken came from my Granny, that was her favorite meal and I came to love it as well. Moist, sweet and succulent and able to take on the complexities of a multitude of flavors. It can be a fancy dinner or served cold at a picnic. Yet this simple to prepare dish  can scare the "bejeebers" out of  some cooks.Whether fear of over cooking to end up with a tough  and dry bird or one that is under cooked on the inside and burnt on the outside can make some avoid it altogether. I am going to attempt to solve these problems with a few simple techniques.
Most problems have to do with the density of the different parts of the bird, some parts get more heat than others and cook faster. The result is some parts and done and some are under cooked. If we can increase the surface area exposed to the heat and get the chicken into a "user friendly" package it will cook more evenly.
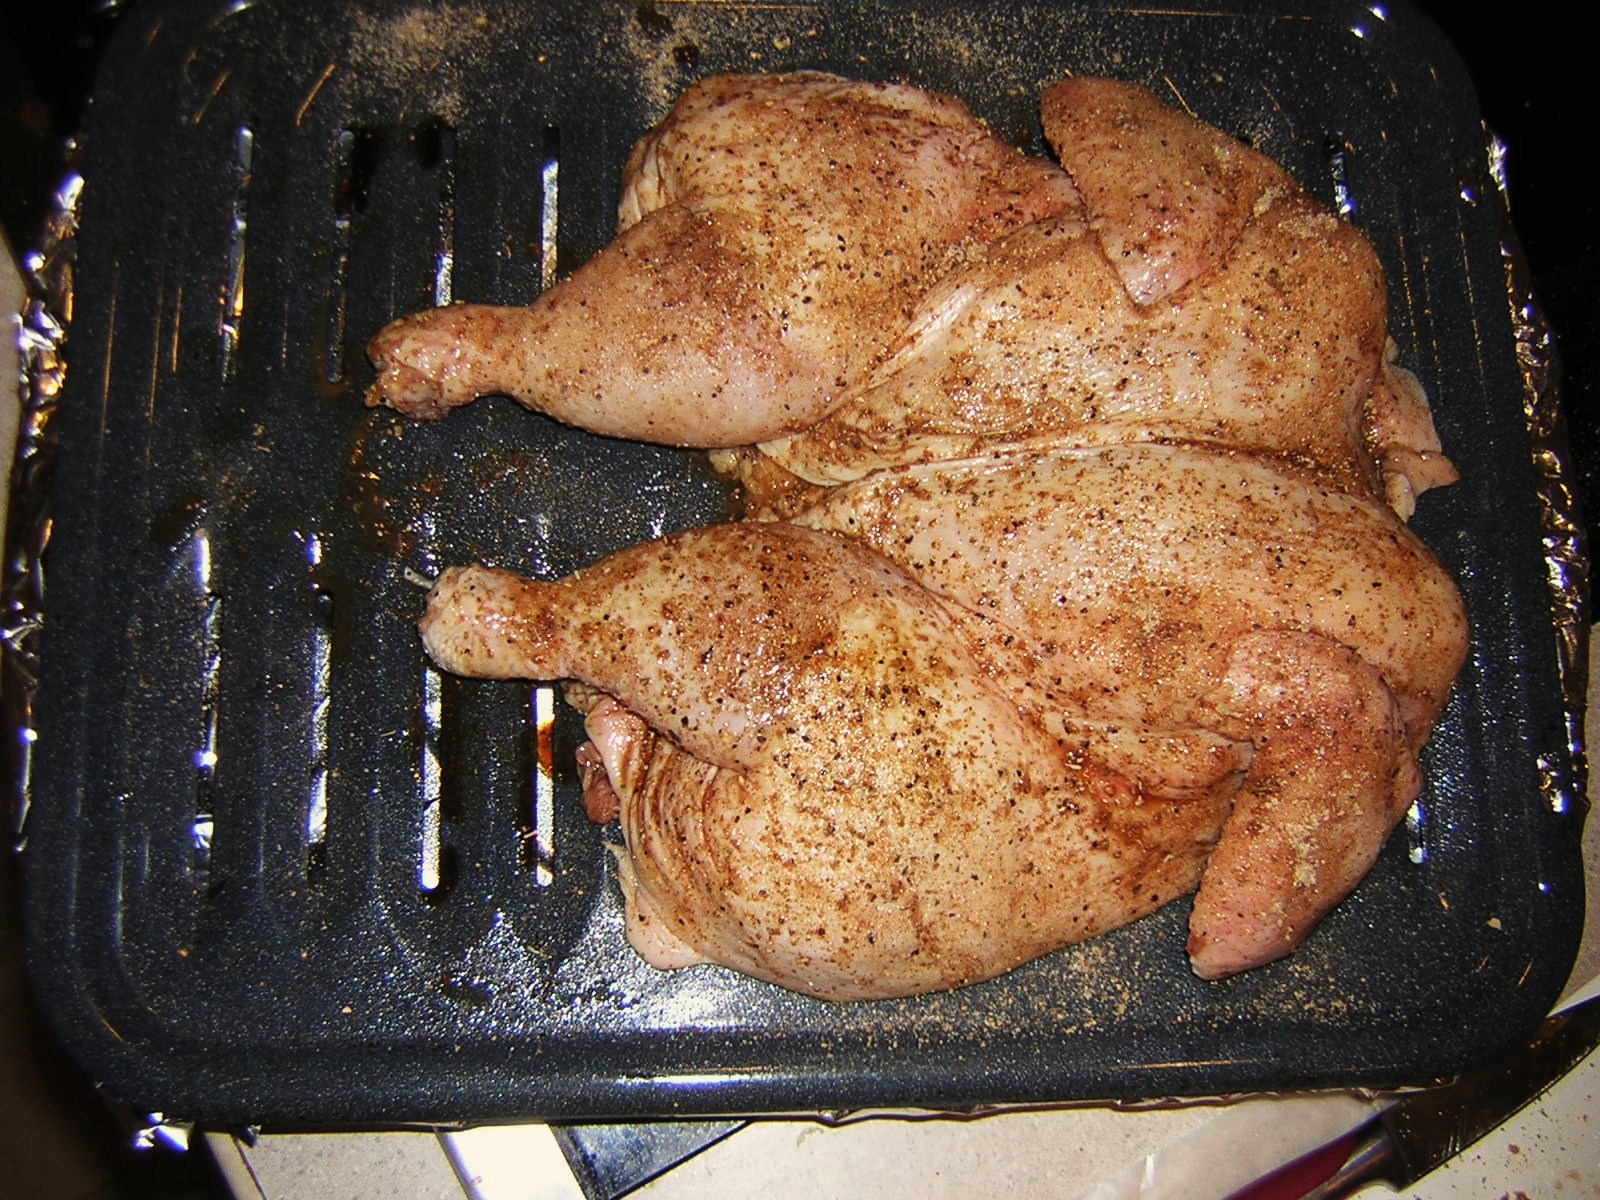
The easiest way to do this is to "Spatchcock" the bird ; remove the back bone and open it up like a book so it lays flat.
This is especially useful if you want to grill,smoke, or BBQ your bird. Seasoned with "Bludawgs Poultry Powder" this particular bird was destined for the smoker until the thunder started to boom and the rain began to fall as I was heading out to build the fire. So a trip to the oven was in order. As referenced by the thermometer in the above picture this only took 1 hour util it was completely cooked. .  Enjoy!

Prep Time: 20 min                         Cook Time:1 hr apox. plus 15 min rest

Ingredients:
1 4-5 lb chicken
Worcestershire sauce
*Bludawgs Poultry Powder (recipe follows)


Tools: Cutting Board, Kitchen Shears, Knives, **Sanitizing solution for counters Broiler pan, Aluminum Foil, Meat thermometer, Wax paper, Paper Towels


Directions:

Peheat oven to 375 º F. Line the bottom of the broiler pan with aluminum foil for ease of cleanup, set aside.
Prepare your work area, remove everything that can be splashed with blood and lay down some wax paper and place your cutting board on it.
Remove the giblets from the cavity and rinse your bird under cold running water inside and out. Pat dry with paper towels and transfer to cutting board, breast side down.
This next step I will assume no liability for for any self injury!!! IF you are confident in your "Knife Skills" and you have a sharp knife feel free to use it, If your Knives are dull or you have poor "Knife Skills" I recommend using the kitchen or poultry shears!!


 Starting at the neck make an incision down each side of the spine along the entire body .Then cut through the ribs where they join the spine.
Remove the spine and save for some homemade stock. Trim away any excess fat from the from the carcass and discard.


 Turn your bird over (breast up) with the heal of your hand placed at the top of breast press down hard to break the breast bone. Lay the wing tip on the breast and with a paring knife or kitchen shears  make a small incision through the skin of the breast at the point where the wing tip joint falls on the breast and insert the wing tip into the incision repeat for the other wing.  


Blot the skin side dry with some paper towels and place skin side down on the broiler pan grate blot the inside dry as well. Wet down the inside with the Worcestershire an season VERY GENEROUSLY with BluDawgs Poultry Powder, Turn the bird over and repeat for the skin side, first the Worcestershire and the Poultry Powder.

Cook on the center rack in the oven for 1 hr or the internal temp on the meaty part of the thigh reaches 185 º F. Remove from oven and tent loosely with Aluminum foil for at least 15 min and allow to rest prior to carving.


* BluDawg's Poultry Powder

3 tbl season salt (Fiesta brand)
1tsp black pepper
1tsp dry sage
1tsp white sugar
optional 1/4tsp ancho chili powder or cayenne

mix all ingredients together  and apply liberally to chicken prior to grilling or roasting.


** Sanitation solution for disinfecting counters and sinks
1tb Chlorine bleach mixed in 32 oz water

 Pour into a spray bottle and spry all counters and sinks to sterilize and disinfect after working with any raw meat.