Showing posts with label Bread. Show all posts

Friday, November 12, 2010

Corn Bread

One of my favorite foods has to Corn bread. Warm from the oven with a slathering of butter it is something that puts a smile on my face. I can't imagine having a bowl of beans with out it as a side or as alight dinner in in the form of "crumble"( broken up in to a glass of buttermilk). There are those who like their corn bread sweet and some prefer it spicy. I'm a firm believer that yellow corn meal produces the beat flavor regardless of where you find yourself in the sweet or savory debate.
Trying to find that perfect harmony between sweet and savoy is not nearly as difficult as trying to get the texture just right. I have had some that was so grainy it was like eating sand and on the other end so tender it wants to fall apart if you look at it to hard. I have played with corn bread  for recipes for a while until I got the textue just right, Moist,with a med crumb crispy on the edges, not to sweet just a tiny bit savory that can go sweet or be spiced to suit  your own taste buy adding chili powder or your favorite chili pepper, herbs like rosemary or cheese. Don't be afraid to twist it a little. Enjoy!


Prep time: 6 min                           Cook time: 30 min


Tools: 8x8 " glass baking dish


Ingredients:

1 cup yellow cornmeal
1 cup all purpose flour
2 tsp baking powder
1 tsp salt
1tbl sugar (add 2 tbl total if you like it sweet)
2  lg eggs
1/2 cup vegetable oil
1 cup milk


Directions:

Grease the 8x8" baking dish and set aside, preheat your oven to 400 º F.

In a medium mixing bowl measure out all the dry ingredients stir to combine and form a well in the center
In  a 2 cup measuring cup beat two lg eggs with the 1/2 cup oil stir in the milk


Pour the wet ingredients into the well in the center of the dry ingredients and mix together until you can not see and dry remaining. the batter will have some lumps and that is ok, It is important not to over mix.
Pour the batter immediately into the prepared baking dish and strait into the Preheated oven on the center rack. Bake 30 - 35 min until a wooden skewer  inserted in the center comes out clean.

Tuesday, October 19, 2010

Doughnut Muffins


I'll admit it I have a doughnut problem. What can be better than fried dough, slightly sweet with a hint of nutmeg dusted in cinnamon and sugar, parked along side a steaming fresh cup of coffee? Some may say a muffin of some sort or maybe you are in the middle somewhere between the hole and the paper. Regardless of your stance on one thing we can all agree, they are both pretty tasty.
As much as I like doughnuts I would rather let some one else do all the frying I don't like all the cleanup involved and during my last check up the Dr. gave me the long face over my cholesterol. So looking for ways to get it under control and still satisfy my cravings I went in search of a recipe that would solve the problem. That is when I discovered Doughnut Muffins.  The resulting recipe is a collimation of ideas from several recipes along with some personal imitative to reduce the calories and the bad fats but retain all the good taste and texture. Enjoy!

Prep time:  10- 12 min                          Bake time: 15 min                  Yield: 1 dz 


Ingredients:

1/4 cup butter flavor vegetable oil
1/2 cup splenda
2 tbl + 2 tsp splenda brown sugar subistute
1 egg + 2 egg whites
1 1/4 tsp nutmeg
1 tsp vanilla
3/4 cup water
2 2/3 cup Universal Baking mix

Topping
3 tbl melted unsalted butter
2 tbl sugar + 1 tsp cinnamon combined


Tools: Muffin tin, paper liners, pastry brush


Directions:

Preheat  your oven to 425º F, put the paper liners in the muffin tin and set aside.
In the bowl of your mixer combine, light & dark splenda, eggs, oil and vanilla. beat on med speed for 2 min

Slow the mixer to the slowest speed and add 1/3 of the baking mix and 1/3 of the water mix 1 min then repeat until all of the baking mix and water are in. Beat on med for 3 min.
Spoon the batter into the liners filling 3/4 full, bake on the center rack 15  min. remove from oven and allow to cool in the pan 10 min then remove to a cooling rack and allow to cool to room temp
.
Brush the top of each muffin with melted butter and dust the tops generously with the cinnamon sugar, or inject with your favorite jam for jelly doughnut muffins.

Friday, October 8, 2010

Buttermilk Bisciuts>Put Some South in Your Mouth


 A staple on any table in the South and welcome at any meal the simple buttermilk biscuit fresh from the oven soft & tender, lighter than a feather,slathered with butter or your favorite jam, is indeed a wonderful thing. It shines at breakfast smothered in sausage gravy or in a portable version, split and filled with bacon, sausage or ham. As a simple desert with a little Cane syrup or Molasses, Strawberry Short Cake, or topping a Fruit Cobbler, the simple buttermilk biscuit stands tall.
Biscuits are as easy to prepare as they are to mess up. They turn out dry or heavy they don't rise or they burn on the bottom. These little set backs can be fixed with some TLC. You must treat the biscuit dough gently, carefully measure the ingredients. Over handling once the  buttermilk is added will result in a tough & heavy biscuit, to much shortening will result in a dry and crumbly biscuit that will more than likely burn on  the bottom. Old Baking Powder will prevent them from rising(when you open a new can date it) if it has been opened over 6 months consider replacing it. If in doubt it can be tested: put 1/2 tsp vinegar in a cup of water while holding it over the sink, sprinkle 1/2 tsp baking powder in the cup, if it foams up it is still good.
Some folks swear by self rising flower and die hards consider it cheating I will cover both and you and make your own decision the biscuits are identical so what ever works for you is fine. Enjoy!

Prep time: 15 min                                          Baking time: 10 - 12 min.               Makes: about 1 1/2 dz

Ingredients:

(Self Rising Flour)
2 /12 cups flour + extra for dusting
1/2 + 2 tsp shortening
2 tbl sugar
1/2 tsp baking soda
3/4 cup Butter milk
*if using All Purpose flour
*3 tsp baking powder
*1 tsp Salt


Tools: Large mixing bowl, measuring cups & spoons, fork, rolling pin, biscuit cutter, baking sheet

Directions:
 
Measure the flour into the mixing bowl, add the sugar, 1/2 tsp of  baking soda (*if using A/P flour and the salt and baking powder) using the fork thoroughly mix these ingredients together.
Place the shortening in the bowl and blend together ( I find my fingers to be the best tool for this job) when no pieces of shortening are visible and the flour has the look and feel of damp sand  it is mixed.


                                          Form a well in the center of the bowl


                                          Pour the Buttermilk into the center.
  

Using the fork pull the flour into the center in a *folding motion (* pull to the center and turn the flour under) moving around the circumference of the bowl. As soon as you see there is no more dry stuff. "STOP MIXING!!" The dough will be soft moist and sticky and maybe a little lumpy looking.             


Put a good dusting of flour on your work surface and turn the dough out onto it. using well floured hands pull the dough together into a ball and *knead three times(* press down on the ball with the heal of your hand pressing into a disk, fold the edges to the center to form a ball, repeat). Use just enough flour to prevent sticking."Less is more." 

After the 3 rd cycle pat(roll) the dough out into a 3/4" disk.( I have a Rolling pin  but never use it if you want to use one feel free. I prefer the hands on approach.)


   Fold the the disk into 1/3 rds and turn seam side down press out to 3/4" thick, do this 3 times.


Pat or roll out into a 3/4" disk and square up the sides. Using a biscuit cutter that has been coated with flour, (I don't own a biscuit cutter I use an old can about 2" in diameter) cut out your biscuits pressing straight down, do not twist the cutter. Twisting will seal the outer edges and prevent the biscuits from rising as high as they can.


Place the biscuits on the sheet pan with the edges touching it helps them to rise higher when the bake. Cover with a towel and allow to rest while the oven is preheating.

         Preheat your oven to 425 º F. and bake on the center rack for 10 -12 min.

Friday, September 24, 2010

No Knead Honey Oat Sourdough Bread

*This is a continuation of a series on Sourdough*

The old biblical saying "Man dose not live by bread alone," should have been rephrased to; " Man dose not live by Boring bread alone!" White bread is plain boring as are some whole wheat's, especially the stuff from commercial bakeries. I guess it is age that gives us the palate to really appreciate the complex flavor and aroma from a mutli grain or a pumpernickel and that wonderful sourdough.

 There is nothing quite like the aroma of fresh baked bread to awaken the hunger pangs and make adults act like children, given a warm slice with butter & jam we are all smiling 7 year olds for a moment. That aroma  holds special memories of Moms kitchen after school. I was the designated taste tester and she would always hand out  a sample slathered with butter.Mmmmm!

I have a bowl of oatmeal almost every day with a drop or two of honey. Those flavors are made for each other,and lead me to develop this bread recipe.
I don't remember when I had my first taste of bread made with Honey but when ever it was from that moment I was hooked. Honey adds that special something to the flavor. Top this off with some flavorful grains and throw in some sourdough batter and well... it is pretty special.

I like to bake my own bread and haven't bought any from a store for several years.  On a ranch there are plenty of chores to do and time spent kneading bread can be utilized for other things, so this is the reason I made this a No Knead recipe for  Honey Oat Sourdough.

Baking with sourdough is a little different than using commercial yeasts as the wild yeast in sourdough take longer to rise and are affected more so by temperature. Raising at 75 º F is the optimum for a good flavor. Cooler temps produce a milder flavor and warmer ones a stronger flavor. Rise times are typically 12- 18 hrs depending on the strength of the wild yeast in your starter.
Most recipes call for bringing your starter to room temp removing the portion you will need and feeding the day before prior to mixing the ingredients to make the bread. I say it is not necessary, I go about it in a different manor to achieve the same result and save 8 hrs.
Well lets make some No Knead Honey Oat Sourdough Bread. Enjoy!


Ingredients:

1cup sourdough starter batter
2 cups whole wheat flour
3-5 cups all purpose flour
3/4 cup slow cooking oats+2 tbs
1 1/2 tsp salt
1/4 cup honey
1/3 cup powdered milk
1 1/2 cup water
2 tbs oil or shortening(melted)
1/4cup sunflower seeds(optional)

Directions:

Remove starter from the refrigerator measure out 1 cup and place in a nonreactive bowl, add milk powder, water, oats and 1 cup wholewheat flour, and 1 cup water. Mix with a wooden spoon and cover with plastic wrap and leave on counter over night.
You have just feed and awakened your starter and created a sponge in one step and saved 8 hours.
  *(feed your starter the same time: mix 1 1/2 cup A/P flour and 1 cup water together and add to your starter and allow to sit in the counter over night covered with a dish towel.)
The next day remove the plastic wrap and transfer the sponge to the bowl on the stand mixer add remainder of the water, oil, Honey, salt, the remainder of the wholewheat flour
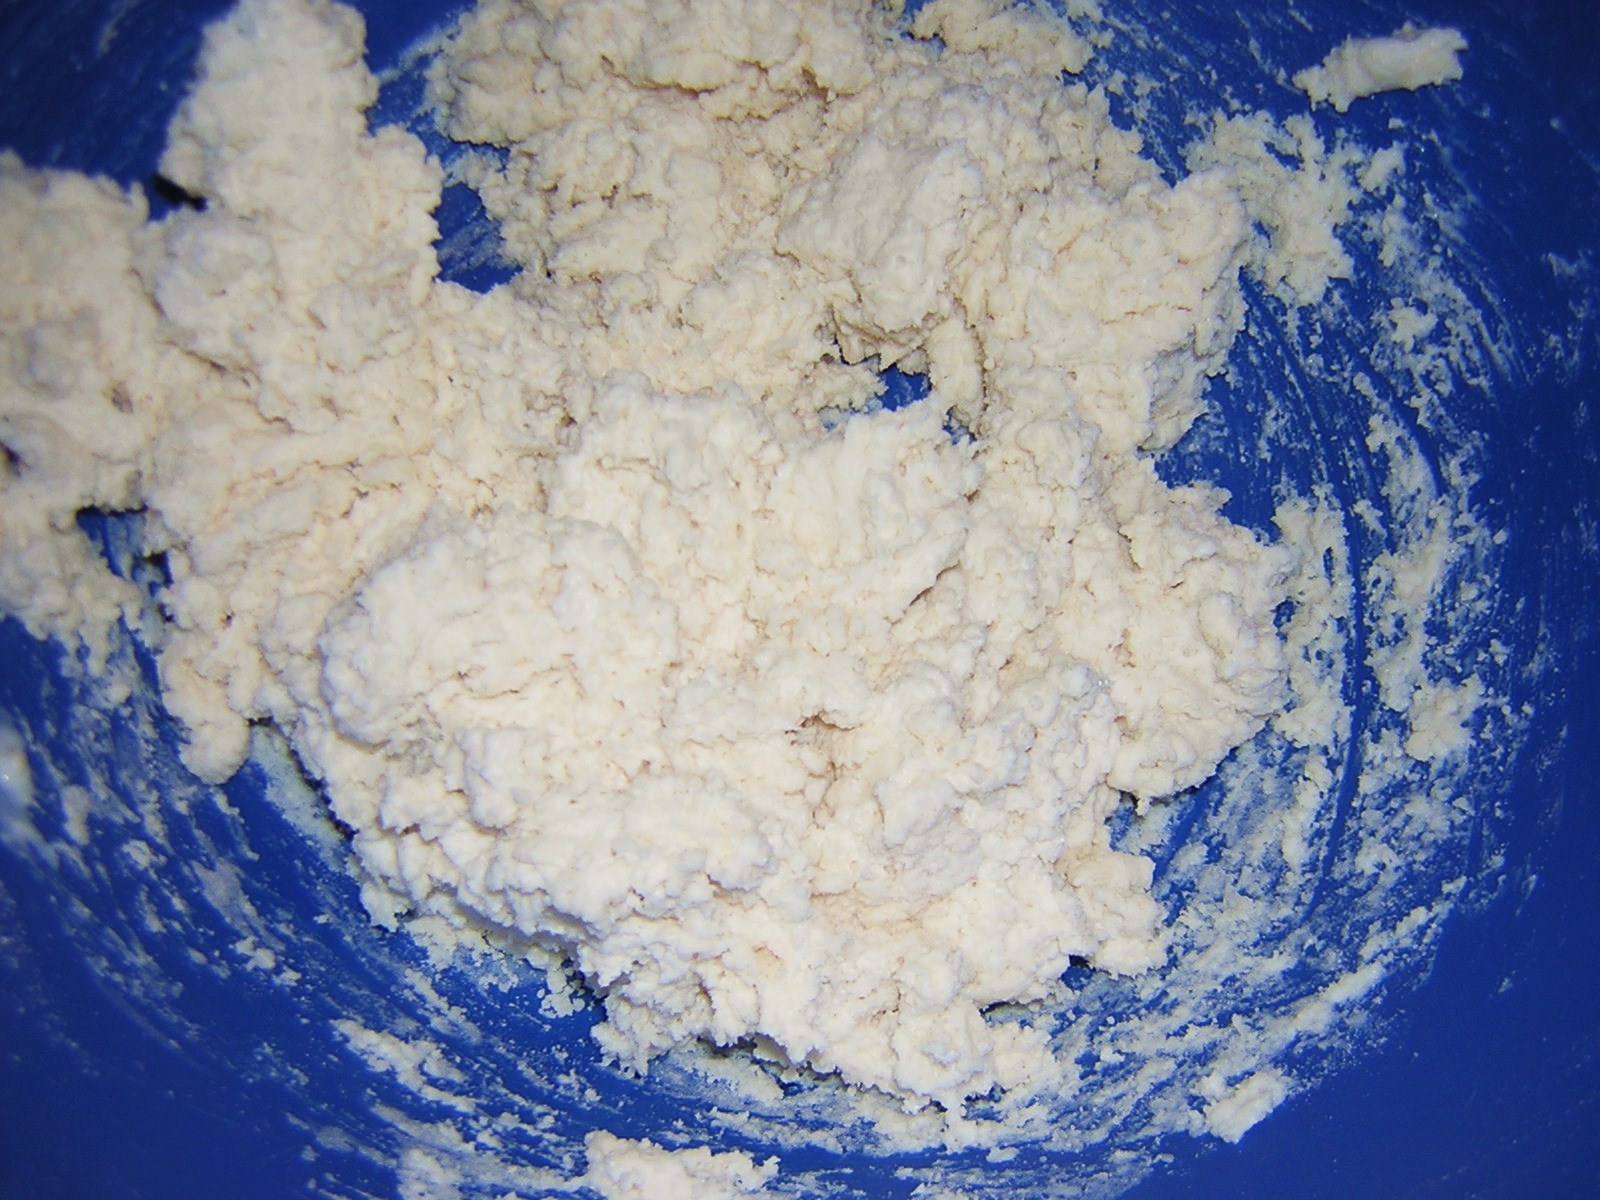
place the dough hook on the mixer and start mixer on #2 mix 1 min. add the sunflower seeds and 1 cup A/P flour mix 1 min. add another cup of A/P and mix other min. The dough should start to loose its liquid state and begin to firm up. Continue to ad flour slowly until the dough comes away from the sides and the bottom of the bowl. at this point the dough should be very tacky.  Stop!!! add no more flour.
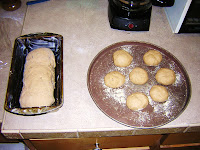
Grease a loaf pan and transfer  the dough to  the pan and cover loosely with plastic wrap place in a draft free area to raise until double in size. Bake in a preheated 400 º F oven 30 min or an internal temp of 200 º F.
Cool in pan 10 min then transfer to cooling rack.